How to Repair Cracks in a Concrete Roof Slab
Concrete roof slabs are built to last, but over time, they can develop cracks due to factors like weather conditions, structural stress, or poor installation. These cracks, if left unchecked, can lead to more severe issues, such as leaks, water damage, or even compromised structural integrity. But don’t worry—repairing cracks in a concrete roof slab isn’t as daunting as it might seem. With the right approach and tools, you can restore your roof’s durability and keep your home safe and dry. In this guide, we’ll walk you through How to repair cracks in a concrete roof slab, share tips on how to prevent future damage and explain why regular maintenance is crucial. Whether you’re a seasoned DIYer or just looking to understand the process, this post is for you!
Understanding the Cause of Cracks
Before diving into the repair process, it’s essential to understand why your concrete roof slab might be cracking in the first place. Cracks can occur due to:
Thermal Expansion and Contraction: Concrete expands in the heat and contracts in the cold. Over time, this constant movement can cause cracks to form.
Structural Movement: Buildings naturally settle over time, which can cause stress on the roof slab, leading to cracks.
Water Damage: If water seeps into the concrete and then freezes, it can expand and create cracks.
Poor Installation: If the concrete wasn’t mixed or poured correctly during installation, it could be more prone to cracking.
Understanding the root cause helps you address not just the cracks but also the underlying issue, ensuring your repairs are long-lasting.
Tools and Materials You’ll Need
Before starting the repair process, gather the necessary tools and materials:
- Concrete Crack Filler: Available in various forms, such as liquid, paste, or powder.
- Concrete Patch: For larger cracks or where the surface needs to be built up.
- Wire Brush: To clean out loose debris and dirt from the cracks.
- Chisel and Hammer: For widening cracks if necessary.
- Trowel: To apply and smooth the filler or patch.
- Caulking Gun: If you’re using a crack filler that comes in a tube.
- Protective Gear: Gloves, safety glasses, and a dust mask.
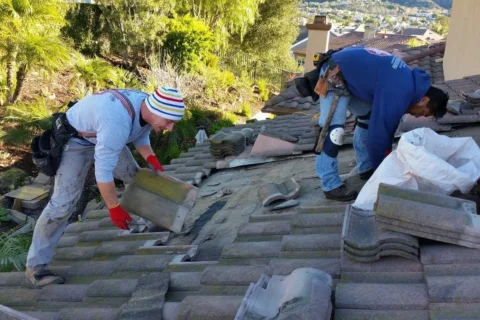
Step-by-Step Guide to Repairing Cracks
Now, let’s get into the nitty-gritty of repairing those cracks. The process varies slightly depending on the size of the crack, but the general steps are as follows:
Inspect the Roof Slab
First, take a close look at your concrete roof slab. Identify all the cracks and mark them. Note their size and direction, as this will determine the type of repair material you’ll need. If the crack is wider than 1/4 inch, you might need a concrete patch rather than just a filler.
Prepare the Crack
Cleaning is crucial for a successful repair. Use a wire brush to clean out any loose debris, dirt, or old filler from the crack. If the crack is narrow, you might need to use a chisel and hammer to widen it slightly. This might sound counterintuitive, but widening the crack provides a better surface for the filler to adhere to.
Apply the Concrete Crack Filler
Once the crack is clean, it’s time to fill it. If you’re using a liquid or paste filler, you can apply it directly from the container or use a caulking gun. For powder-based fillers, you’ll need to mix it with water according to the instructions. Start by applying a small amount of filler into the crack, pressing it in with a trowel to ensure it gets deep into the crack. Then, apply more filler until the crack is slightly overfilled. Use the trowel to smooth the surface and remove any excess material.
For Larger Cracks: Use a Concrete Patch
If you’re dealing with a larger crack or if the surface of the slab is uneven, you’ll need to use a concrete patch. Apply the patching compound with a trowel, making sure to press it firmly into the crack and any surrounding areas that need leveling. Smooth the surface as much as possible, and let it dry according to the manufacturer’s instructions.
Allow the Repair to Cure
Curing is the process of letting the concrete repair material harden and gain strength. This is a critical step. Depending on the product you’re using, curing time can vary from a few hours to a few days. During this time, it’s essential to keep the repair area moist. You can do this by lightly spraying it with water or covering it with a damp cloth or plastic sheet.
Apply a Sealant (Optional)
To prevent future water damage, consider applying a concrete sealant over the repaired area. Sealants create a waterproof barrier that helps protect the concrete from moisture, which is especially important for roof slabs that are exposed to the elements.
Tips for Preventing Future Cracks
Repairing cracks is essential, but preventing them in the first place is even better. Here are some tips to help you keep your concrete roof slab in good shape:
Regular Inspections: Keep an eye on your roof slab, especially after extreme weather conditions. Catching small cracks early can prevent them from becoming larger problems.
Waterproofing: Make sure your roof has a good waterproofing system in place. This includes ensuring that gutters and drains are functioning correctly to prevent water buildup.
Proper Maintenance: Regular maintenance, such as cleaning and resealing the roof, can extend its lifespan and reduce the likelihood of cracks.
Control Joints: If you’re pouring a new concrete slab, consider adding control joints. These are planned cracks that allow the concrete to expand and contract without causing random cracking.
When to Call a Professional
While many crack repairs can be done yourself, there are times when it’s best to call in a professional. If the crack is extensive, if the roof is sagging or leaking, or if you’re unsure about the structural integrity of the slab, a professional inspection is warranted. In some cases, the crack could be a sign of a more significant issue that requires more than just a simple repair. If you’re in the Etobicoke area and facing issues with your concrete roof slab, there are plenty of professionals who specialize in roof repair. It’s essential to choose someone with experience in roof repair in Etobicoke to ensure the job is done correctly and safely.
Why Regular Roof Maintenance is Key
Regular maintenance of your concrete roof slab can save you a lot of time, money, and stress in the long run. By addressing small issues before they escalate, you can extend the life of your roof and avoid costly repairs. Plus, a well-maintained roof is crucial for the overall health of your home. In Etobicoke, where weather conditions can be tough on roofs, regular maintenance is even more critical. The combination of freezing winters and hot summers can take a toll on concrete, so staying on top of repairs and inspections is key.
Conclusion
Repairing cracks in a concrete roof slab is an essential task that shouldn’t be ignored. With the right tools, materials, and a bit of elbow grease, you can handle minor cracks yourself and ensure your roof remains strong and durable. Remember, regular maintenance is your best defense against future damage. Keep an eye on your roof, address any issues as soon as they arise, and don’t hesitate to call in a professional if needed. For homeowners in Etobicoke, finding a reliable roof repair service is vital to ensuring your home stays safe and dry, no matter what Mother Nature throws your way.
Protect your home with the quality and expertise you deserve. Choose DVR Roofing for reliable service that keeps your roof in top shape year-round. Contact us today and secure your peace of mind!
Dealing with a leaking roof can be frustrating, especially when it feels like every heavy rain could lead to more damage. Whether you have an asphalt…