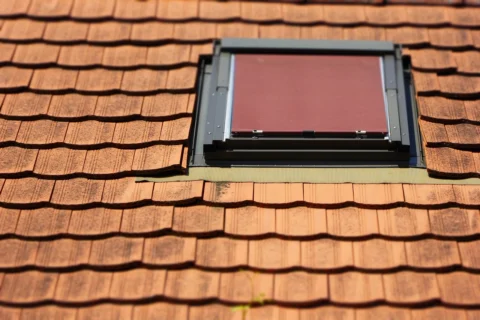
How to Repair a Broken Roof Tile
If you’ve found yourself staring at a cracked or broken roof tile and wondering How to repair a broken roof tile?, you’re not alone. Roof tiles can crack for various reasons: harsh weather, falling debris, or simple wear and tear over time. While it might seem like a minor issue, a broken tile can lead to serious problems like leaks, insulation damage, and even structural decay if left unaddressed.
For homeowners in Mississauga, Ontario, where unpredictable weather is common, maintaining a well-protected roof is essential. Let’s dive into the process of repairing a broken roof tile, highlight key details many don’t mention, and explore how DVR Roofing can assist you with your roofing needs.
Why Repairing Broken Roof Tiles Is Crucial
A small crack in a tile might seem harmless at first glance, but it can have serious repercussions:
- Water Infiltration: Cracked tiles allow water to seep through, which can lead to leaks and damage to the interior of your home.
- Energy Efficiency Loss: Roof tiles are designed to insulate your home. Damaged tiles can disrupt this balance, increasing energy costs.
- Pest Infestations: Gaps from broken tiles create an entry point for pests like rodents and insects.
Did you know that, according to industry statistics, a damaged roof can reduce a home’s energy efficiency by up to 25%? For Mississauga homeowners, where winters can be harsh, this is an expense no one wants to incur.
The Steps to Repair a Broken Roof Tile
Here’s a detailed step-by-step guide to repairing a broken roof tile:
1. Safety First
Before you begin, prioritize safety. Use a sturdy ladder, wear slip-resistant shoes, and, if possible, work with a partner. Many people overlook the importance of using a harness for additional security on steep roofs.
2. Identify the Damage
Locate the broken tile and assess its condition. Check nearby tiles as well; one broken tile can sometimes indicate surrounding damage due to shifting weight or pressure.
3. Remove the Broken Tile
This step is more intricate than most guides let on. Use a specialized crowbar or a flat pry bar to lift the tile without damaging adjacent tiles. Slide the broken tile out carefully. Pro tip: Avoid working on extremely hot or cold days, as tiles are more prone to cracking under extreme temperatures.
4. Install the Replacement Tile
Place the new tile by sliding it into the gap and securing it in position. Some tiles require adhesive, while others might need nails or clips, depending on the design. Use weather-resistant adhesive to ensure longevity.
5. Inspect the Roof Post-Repair
Once the tile is replaced, inspect your roof to ensure no debris is left behind, and confirm the new tile is flush with the surrounding ones.
Expert Tips for Long-Lasting Roof Repairs
Many DIY guides miss critical aspects of tile repair. Here’s what they don’t often tell you:
- Material Matching Is Vital
Not all tiles are created equal. Mississauga roofs often feature specific materials like clay, concrete, or slate. Using mismatched tiles can lead to uneven weight distribution and additional damage. - Weatherproof Coating
After installing the new tile, applying a weatherproof sealant can enhance its durability against Mississauga’s unpredictable weather. - Inspect for Underlying Damage
Cracked tiles might be a symptom of a larger problem, like weakened underlayment or shifting roof structures. Checking for these issues can save you from future repairs. - Document Maintenance
Keep a record of your repair for insurance purposes. If storms cause damage later, this documentation can simplify claims.
Read more about “How to Repair Cracks in Concrete Roof Slab” on our blog page today!
How DVR Roofing Can Help
When it comes to roofers in Mississauga Ontario, no one does it better than DVR Roofing. With years of experience serving local residents, we understand the unique challenges that Mississauga’s climate brings. Our team specializes in:
- Tile Replacement: We ensure every replacement matches your roof’s material and style.
- Comprehensive Roof Inspections: Identifying hidden issues that DIY solutions might miss.
- Emergency Repairs: When bad weather strikes, you can count on us for quick, reliable service.
- Preventative Maintenance Plans: Helping Mississauga homeowners keep their roofs in top condition year-round.
Additional Insights About Mississauga Roofing
Mississauga experiences over 130 days of precipitation annually. This makes a sturdy, well-maintained roof essential. According to a 2023 survey, 60% of roof-related insurance claims in Ontario are due to water damage—a preventable issue if broken tiles are repaired promptly.
Investing in professional services not only ensures your roof is repaired correctly but also extends its lifespan. DVR Roofing uses advanced tools and techniques to deliver seamless, lasting solutions.
Conclusion
Repairing a broken roof tile is more than just a quick fix—it’s an investment in your home’s safety and efficiency. While some repairs might seem straightforward, enlisting professionals like DVR Roofing ensures the job is done right the first time.
Don’t let a minor roof issue turn into a major headache. Contact DVR Roofing today for expert Roofers in Mississauga Ontario services. Whether it’s a simple tile replacement or a comprehensive inspection, we’ve got you covered. Protect your home, save on energy costs, and enjoy peace of mind knowing your roof is in the hands of trusted professionals. Call us now to schedule your consultation and give your roof the care it deserves!


