How to Repair Slate Roofs
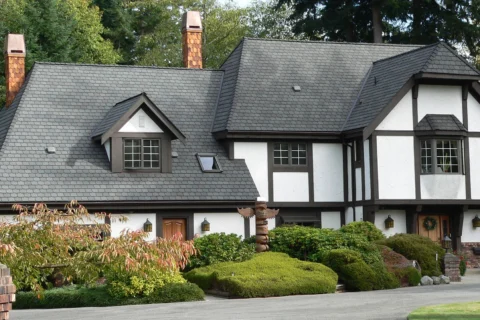
Slate roofs are renowned for their beauty and longevity. They’ve graced homes with their natural elegance for centuries, and when maintained properly, a slate roof can last well over a hundred years. But what happens when your slate roof starts showing signs of wear and tear? Don’t worry; repairing a slate roof isn’t as daunting as it sounds. In this guide, we’ll walk you through the process of how to repair slate roofs, ensuring your home remains as stunning and secure as ever. Plus, if you’re in the Greater Toronto Area, you’ll find that roof repair Mississauga experts are just a call away.
Why Slate Roofs Need Special Attention
Before diving into the repair process, it’s essential to understand why slate roofs require a unique approach. Unlike asphalt shingles, slate tiles are natural stone, making them incredibly durable but also more challenging to handle. When one tile is damaged, it’s crucial to replace it with care, as the surrounding tiles can be fragile. Also, improper repair can lead to leaks, further damage, or an unsightly roof.
Identifying Common Slate Roof Issues
The first step in any repair process is to identify the problem. Here are some common issues you might encounter with a slate roof:
Broken or Cracked Tiles: Slate tiles can break or crack due to severe weather, falling branches, or even improper installation.
Missing Tiles: Sometimes, tiles can slip out of place or fall off due to a failed fastener or the natural aging process.
Flashing Problems: Flashing the metal pieces around chimneys, valleys, and other roof intersections can deteriorate over time, leading to leaks.
Delamination: This is when layers of the slate tile peel away, making the tile thinner and more susceptible to breakage.
Safety First
Before you start, remember that working on a roof can be dangerous. If you’re uncomfortable with heights or unsure about your ability to handle the repairs, consider hiring a professional. For those who prefer a DIY approach, ensure you have the following safety gear:
- A sturdy ladder
- Non-slip shoes
- A harness (if working on a steep roof)
- Safety goggles and gloves
Always work in dry conditions, as slate roofs can be extremely slippery when wet.
Gather Your Tools and Materials
For slate roof repair, you’ll need:
- Replacement slate tiles (match the size and color as closely as possible)
- Slate ripper (a specialized tool for removing damaged tiles)
- Hammer
- Slate nails or copper roofing nails
- Slate hook (optional)
- Roofing cement (for sealing)
Make sure you have everything on hand before you start so you don’t have to make multiple trips up and down the ladder.
Removing the Damaged Slate Tile
Carefully examine the damaged tile to determine the best removal method. Here’s how you can do it:
Locate the Nails: Slate tiles are usually fastened with two nails. Use the slate ripper to find and cut through the nails holding the damaged tile in place.
Remove the Tile: Once the nails are cut, carefully slide the damaged tile out. Be gentle to avoid disturbing the surrounding tiles.
Inspect the Area: Before installing the new tile, check the area for any additional damage, such as rotting wood or loose flashing. Address these issues before proceeding.
Installing the Replacement Slate Tile
Now that the damaged tile is out, it’s time to install the new one:
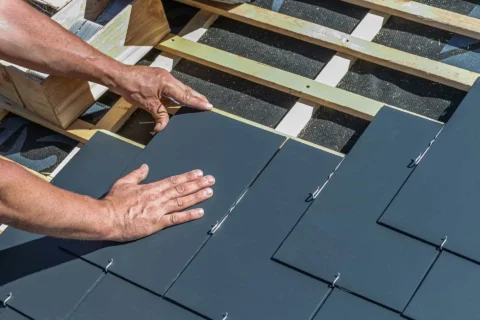
Position the New Tile: Slide the replacement slate tile into the vacant spot, making sure it aligns with the surrounding tiles.
Nail the Tile in Place: Use copper roofing nails to secure the tile. Be sure to drive the nails just below the surface of the slate, so they don’t crack the tile.
Seal the Nails: Apply a small amount of roofing cement over the nail heads to prevent water from seeping in.
If the surrounding tiles make it difficult to nail the replacement slate, you can use a slate hook. This hook holds the tile in place by hooking onto the slate above it, providing a secure hold without the need for nails.
Checking and Repairing the Flashing
While you’re up there, it’s a good idea to inspect the flashing around chimneys, valleys, and roof edges. Flashing is crucial for directing water away from these vulnerable areas. If you notice any signs of rust, corrosion, or separation, it’s time for a repair:
Clean the Area: Remove any debris, rust, or old sealant from the flashing.
Apply Roofing Cement: Use roofing cement to seal any gaps or cracks in the flashing.
Replace Damaged Flashing: If the flashing is severely damaged, you may need to replace it entirely. This involves removing the old flashing and installing new pieces, securing them with nails, and sealing them with roofing cement.
Inspecting the Entire Roof
After you’ve repaired the damaged tiles and flashing, take some time to inspect the rest of the roof. Look for any additional signs of wear and tear, such as:
- Loose or missing tiles
- Cracked tiles
- Areas where water may be pooling
Address any issues you find, as even minor problems can lead to significant damage if left unattended.
When to Call in the Pros
While DIY slate roof repair is possible, it’s not for everyone. If you’re dealing with extensive damage, a steep roof, or simply feel out of your depth, it’s wise to call in professionals. For those living in the Greater Toronto Area, specifically looking for roof repair Mississauga, there are plenty of experienced contractors who specialize in slate roof repair.
Preventing Future Damage
Once your slate roof is back in top shape, take steps to prevent future damage:
- Regular Inspections: Have your roof inspected at least once a year, especially after severe weather. Catching problems early can save you time and money.
- Tree Trimming: Keep trees around your home trimmed to prevent branches from falling on the roof.
- Gutter Maintenance: Clean your gutters regularly to ensure proper water drainage, reducing the risk of water damage to your roof.
The Cost of Slate Roof Repair
One of the most common questions homeowners ask is, “How much will it cost?” The answer depends on several factors, including the extent of the damage, the size of the roof, and whether you’re doing it yourself or hiring a professional.
- DIY Costs: If you’re handling the repair yourself, your costs will mainly include tools, materials, and possibly a ladder or safety equipment if you don’t already have them. Expect to spend a few hundred dollars.
- Professional Repair Costs: Hiring a professional for roof repair in Mississauga typically costs between $200 to $600 per slate tile replacement, depending on the complexity of the job. Flashing repairs and more extensive work can run higher.
While slate roof repair can be costly, it’s a worthwhile investment to preserve the beauty and longevity of your roof. Plus, compared to a full roof replacement, repairs are a more affordable option.
Final Thoughts: Keep Your Slate Roof Looking Its Best
Repairing a slate roof might seem like a daunting task, but with the right tools, materials, and a bit of patience, it’s entirely manageable. Whether you choose to tackle the repairs yourself or hire a professional, the key is to address any issues promptly to prevent further damage. For those in the GTA, remember that roof repair Mississauga specialists are available to help you maintain your slate roof’s timeless appeal. In the end, a well-maintained slate roof not only enhances your home’s curb appeal but also provides unparalleled protection against the elements. So, keep an eye on your roof, address problems as they arise, and enjoy the lasting beauty that only a slate roof can offer.
Ready to give your slate roof the expert care it deserves? Trust DVR Roofing to handle your roof repair in Mississauga with precision and professionalism. Contact us today to ensure your home stays protected and looks its best for years to come.


