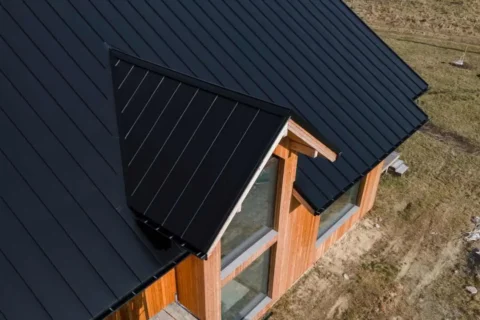
How to Install Slate Roof Shingles
If you’re considering upgrading your home’s exterior, you might have come across the idea of installing slate roof shingles. There’s something undeniably elegant about a slate roof. Its classic appearance and durability make it a popular choice for homeowners looking to add a touch of luxury and timelessness to their property. But how to install slate roof shingles? And more importantly, why might you want to consider this roofing option for your home in Etobicoke? In this guide, we’ll walk you through the process of installing slate roof shingles, highlighting why they’re a great choice for your home, especially if you’re looking for Etobicoke roofing solutions. Whether you’re a DIY enthusiast or someone who just likes to know how things work before hiring a professional, this step-by-step guide will provide you with all the insights you need.
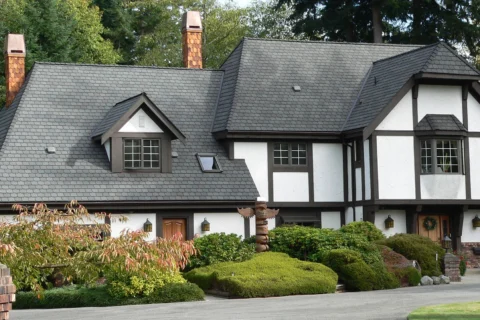
Why Choose Slate Roof Shingles?
Before diving into the how-tos, let’s talk about the why. Slate roof shingles are often regarded as the gold standard in roofing materials. They offer several benefits, including:
Longevity: A slate roof can last over a century, far outlasting most other roofing materials.
Durability: Slate is incredibly resistant to the elements, including fire, water, and extreme weather conditions.
Aesthetic Appeal: The natural stone look adds a touch of elegance and timelessness to any home.
Eco-Friendly: Slate is a natural material that doesn’t require the energy-intensive manufacturing processes of other roofing materials.
Given these advantages, it’s no wonder slate roofs are often associated with upscale homes. However, installing slate roof shingles isn’t a task to be taken lightly. It requires precision, patience, and the right materials. But don’t worry, we’ll guide you through it!
Preparing for Installation
Gather Your Tools and Materials
Before starting, make sure you have all the necessary tools and materials. Here’s a list to get you started:
- Slate roof shingles
- Roofing nails (preferably copper or stainless steel)
- Slate cutter or slate hammer
- Tape measure
- Chalk line
- Ladder and safety gear
- Roofing underlayment
- Flashing materials
- Roofing nails
- Roofing felt or membrane
Check Your Roof Structure
Slate is heavier than most roofing materials, so it’s crucial to ensure that your roof’s structure can support the additional weight. If you’re unsure, consult a structural engineer or a professional Etobicoke roofing contractor. They can assess whether your roof needs reinforcement before you begin the installation.
Measure and Plan
Measure your roof’s dimensions to determine how much slate you’ll need. Planning is key to a successful installation, so take your time to calculate the exact number of shingles required. It’s also a good idea to order extra shingles to account for breakage during installation.
Step-by-Step Installation Guide
Install the Roofing Underlayment
Start by laying down the roofing underlayment. This layer acts as a moisture barrier, protecting your roof from water infiltration. Begin at the eaves (the lower edge of the roof) and work your way up, overlapping each row by at least 4 inches. Secure the underlayment with roofing nails, making sure it’s smooth and free of wrinkles.
Set Up the Starter Course
The starter course is the first row of shingles installed along the eaves. This row is crucial as it sets the foundation for the rest of the roof. Begin by cutting your first slate shingle in half. Place it at the corner of the roof, allowing it to overhang the edge slightly. Continue placing the half-slates along the eaves, ensuring they are level and evenly spaced. Use a chalk line to ensure your starter course is perfectly straight. Any misalignment here will affect the entire roof.
Begin Laying the Shingles
Once the starter course is in place, it’s time to start laying the full shingles. Begin at one end of the roof and work your way across. Each shingle should overlap the one below it by about 3 inches, creating a watertight seal. Use two nails per shingle, placing them about 1 inch from the sides and 2 inches from the top. When driving the nails, be careful not to crack the slate. A slate hammer or nail set can help you avoid this issue. The nails should be driven in flush with the slate surface, not countersunk.
Stagger the Joints
To create a strong, interlocking pattern, stagger the joints of the shingles in each row. This means the joints between shingles in one row should not line up with the joints in the row directly above or below. This staggered pattern helps prevent water from seeping through the roof.
Cutting Slate for Valleys and Ridges
Valleys (the areas where two roof sections meet) and ridges (the highest points of the roof) require special attention. For valleys, you’ll need to cut the slate at an angle to fit snugly into the valley. A slate cutter or hammer can be used for this purpose. For the ridge, you can use either ridge caps or overlap the top rows of shingles from each side of the roof. The method you choose will depend on the look you’re going for and the type of slate you’re using.
Install Flashing
Flashing is a crucial component of your roofing system, especially around chimneys, vents, and valleys. It helps direct water away from these vulnerable areas. Use metal flashing (copper or stainless steel is recommended for slate roofs) and secure it with roofing nails. Make sure the flashing is installed under the shingles to create a seamless, watertight barrier.
Finishing Touches
After all the shingles are in place, inspect your work. Look for any gaps, misaligned shingles, or exposed nails that could lead to leaks. Fix any issues you find, and give yourself a pat on the back – you’ve just installed a slate roof!
Why You Might Want to Hire a Professional
Installing slate roof shingles is not a task for the faint of heart. While we’ve provided a step-by-step guide, it’s important to remember that slate roofing requires precision and skill. If you’re not confident in your ability to take on this project, hiring a professional Etobicoke roofing contractor might be the best option. Professional roofers have the experience and tools needed to install slate shingles efficiently and safely. Plus, they can handle any unexpected issues that arise during the installation, such as structural concerns or difficult roof angles.
Maintaining Your Slate Roof
Once your slate roof is installed, you’ll want to keep it in top shape for decades to come. Fortunately, slate roofs require minimal maintenance, but here are a few tips to ensure your roof remains in excellent condition:
Regular Inspections: Have your roof inspected annually by a professional. They can identify any loose or damaged shingles that need repair.
Clean Gutters: Keep your gutters clean and free of debris. Clogged gutters can cause water to back up and damage your roof.
Remove Moss and Algae: If moss or algae start to grow on your slate roof, remove them with a gentle cleaner designed for slate. Avoid harsh chemicals that could damage the shingles.
Replace Broken Shingles Promptly: If a shingle breaks or becomes damaged, replace it as soon as possible to prevent leaks.
Final Thoughts
Installing slate roof shingles is a rewarding project that can transform the look and feel of your home. With their durability, longevity, and timeless appeal, slate shingles are an investment in your home’s future. Whether you decide to take on this project yourself or hire a professional Etobicoke roofing contractor, you’ll be adding a touch of luxury and elegance that will last for generations. So, are you ready to give your home that timeless, classic look? With this guide, you’re well on your way to achieving the slate roof of your dreams!
Transform your home with the timeless beauty and durability of slate roofing. Trust DVR Roofing, your Etobicoke roofing experts, to install a roof that will stand the test of time. Contact us today to enhance your home’s elegance and protect it for generations to come.
Slate roofs are renowned for their beauty and longevity. They’ve graced homes with their natural elegance for centuries, and when maintained…
When it comes to roofing, one material that stands out for its timeless beauty and durability is slate. If you’re considering slate for your next…